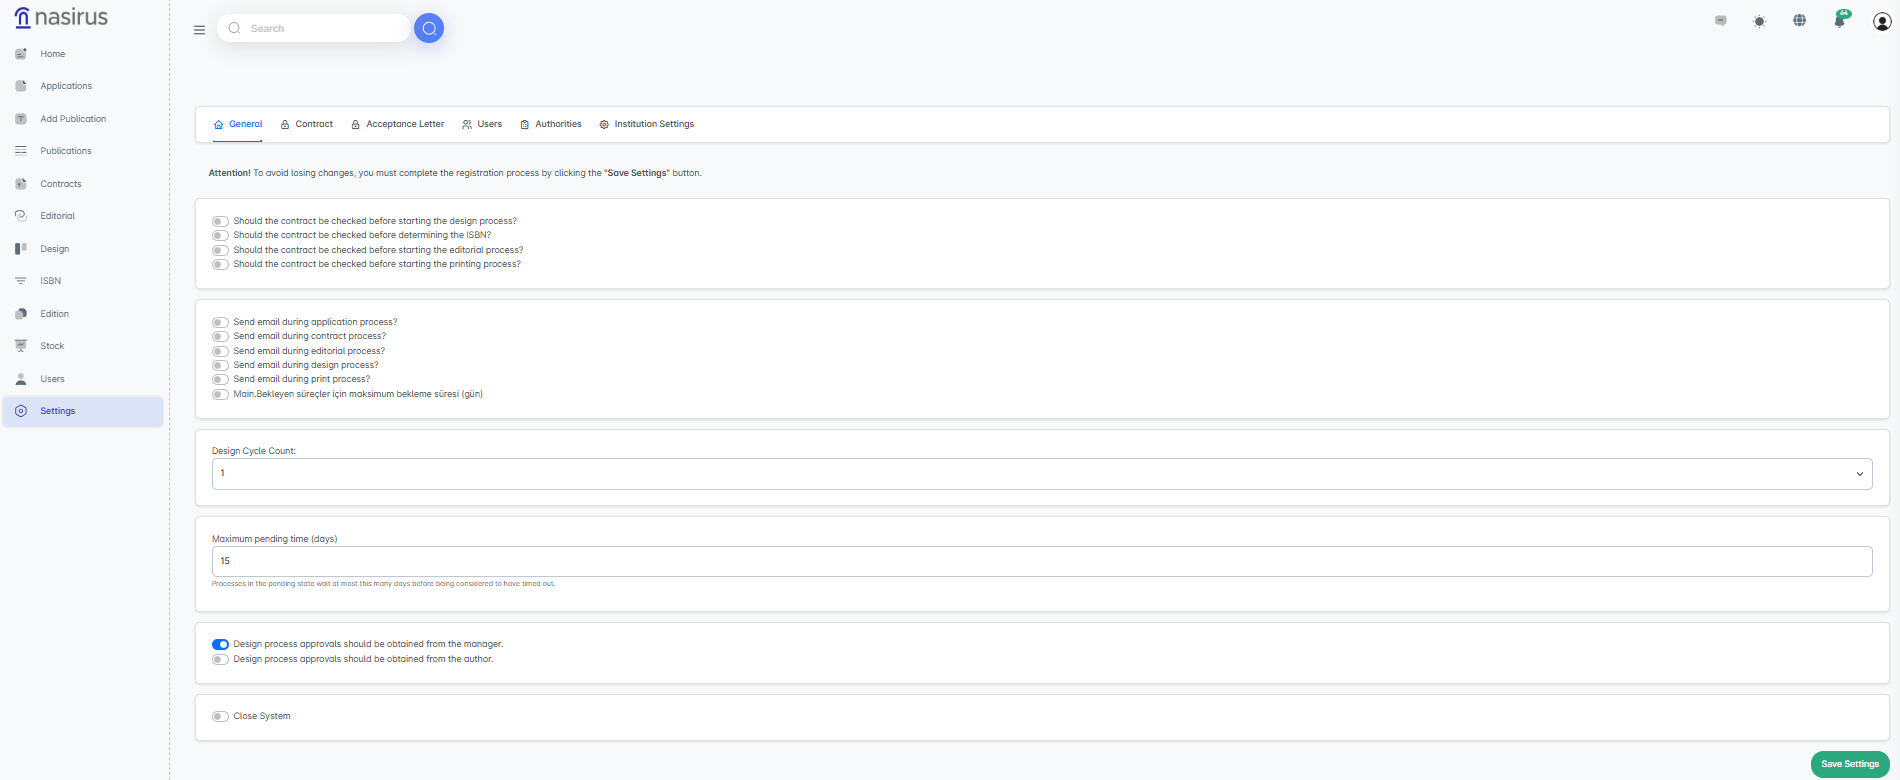
On this screen, basic controls for the system’s operation are performed.
Process Start Controls: You can make contract verification mandatory before starting application, ISBN, editorial, or printing processes. This ensures that processes can only proceed for publications with uploaded contracts.
Email Notifications: Automatic emails can be configured for application, contract, editorial, design, and printing processes. When this feature is enabled, informational emails are sent by the system to all parties involved in the process.
Design Revision Limit: The number of allowed revisions in the design process is defined. For example, if “2” is selected, the file sent to the designer can be revised and submitted for approval a maximum of two times.
Design Process Approval (Administrator/Author): It is determined from whom approvals in the design process will be obtained. If Administrator is selected, all design files are sent to the administrator for approval; if Author is selected, the author approves directly.
Close System to Applications: The system can be generally closed to prevent new applications. However, ongoing processes will continue.
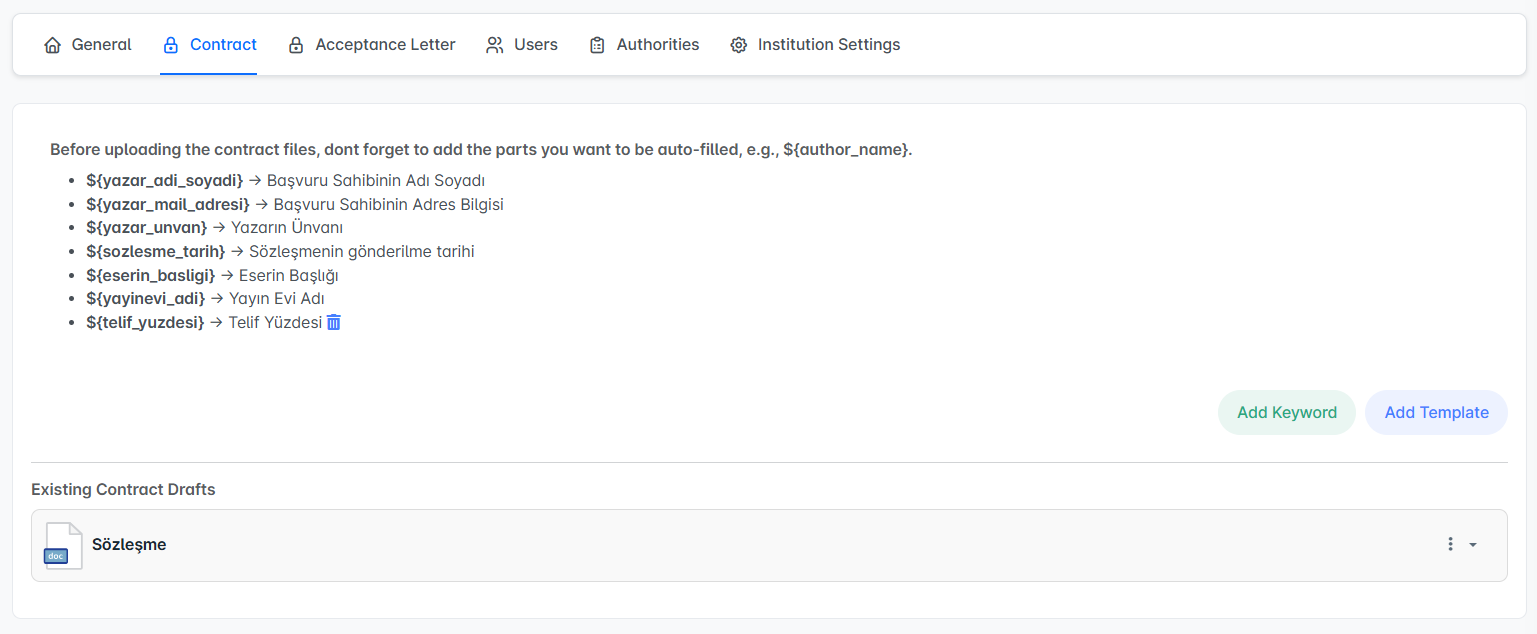
In the Contract tab, there are auto-fill contract templates, which are among the most critical features of the system.
Keywords: Variables to be included in contract drafts are defined here. For example, the keyword ${author_full_name} is automatically replaced with the applicant’s full name when the contract is sent.
Add Draft: Draft files uploaded in Word format are stored in the system. This draft is used when sending contracts, and the keywords within it are automatically filled.
Additional Keywords: Custom fields, such as ${copyright_percentage}, can be added. This field receives its value from the administrator on the contract sending screen (e.g., 20%). If this keyword exists in the draft, the system automatically populates it into the contract during sending.
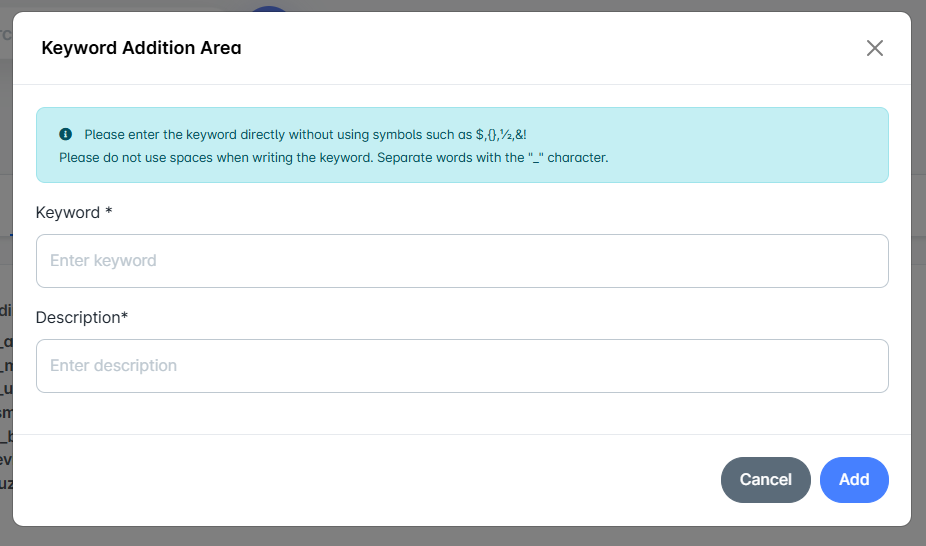
In the Add Keyword window, new variables are defined. For example, ${publisher_name} → "Publisher Name". This can be used later in the draft.
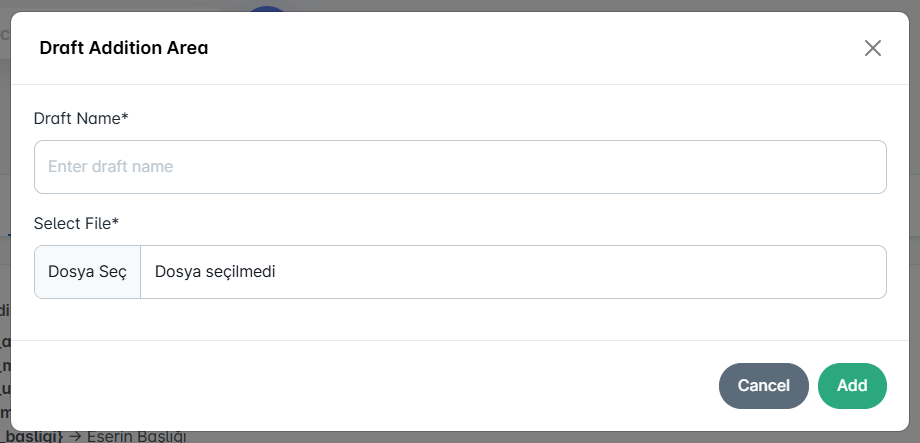
A new Word document is uploaded through the Add Draft window. This draft is saved in the system and can be used in contract submissions.
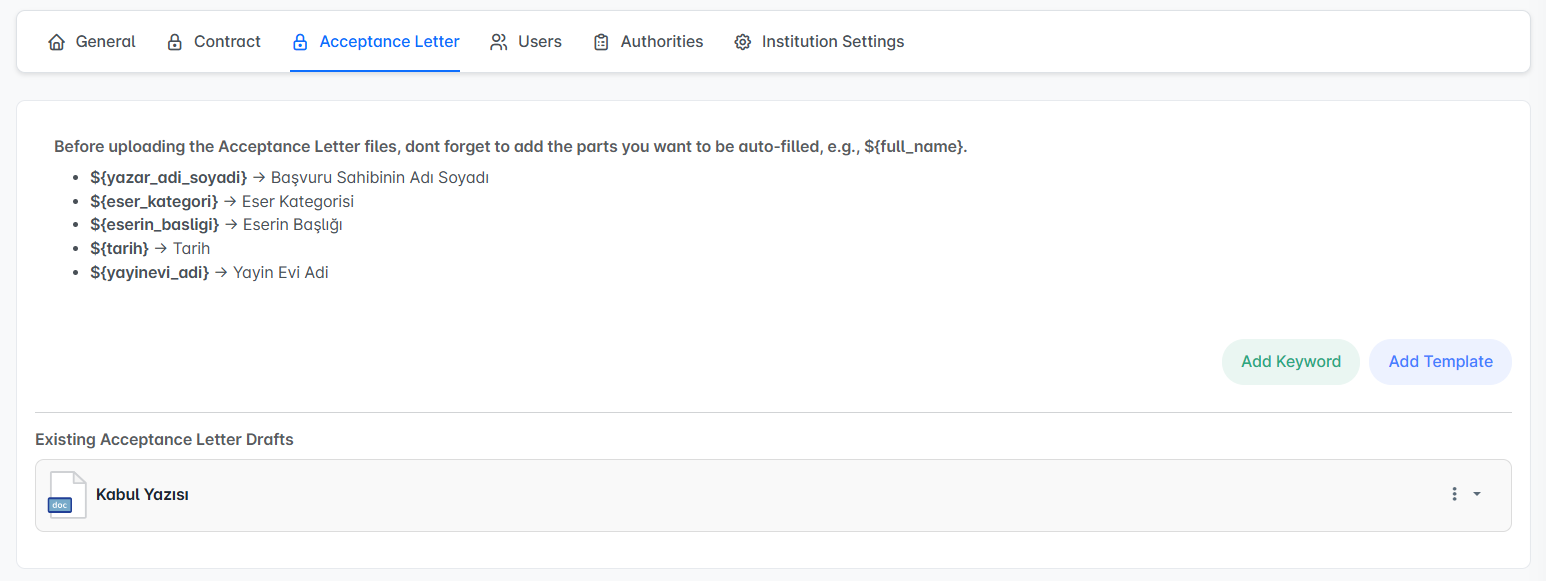
Acceptance letter templates work on the same principle as contracts.
Auto-Fill: Fields such as ${work_category}, ${work_title}, ${date} are automatically populated in the acceptance letter.
Additional Keywords: If a custom field, such as ${reviewer_name}, is added, this information is requested from the administrator on the acceptance letter sending screen. The administrator provides it, and the system populates the corresponding field in the draft.
Upload Draft: Acceptance letters in Word format can be uploaded. The system automatically fills them during sending.
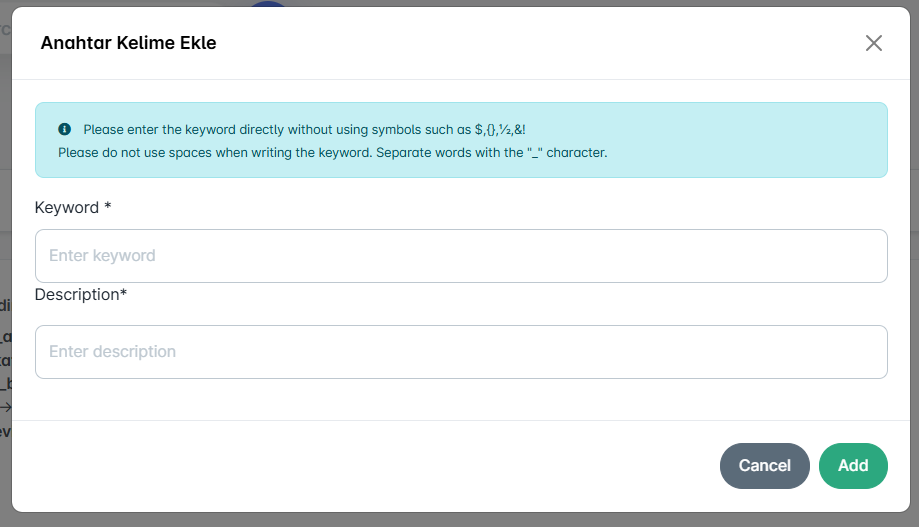
Using the Add Keyword window, variables specific to the acceptance letter are added.
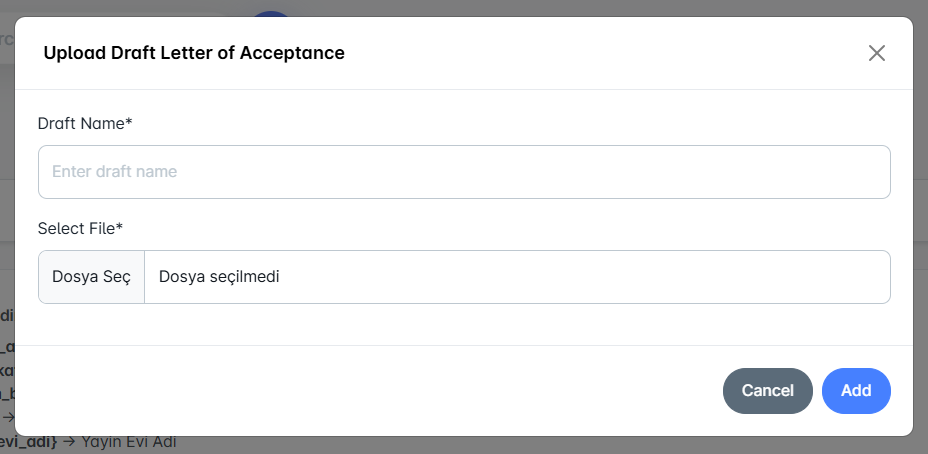
The Upload Draft window is used to upload the acceptance letter draft document. During sending, the automatic fields are populated and delivered to the relevant user.
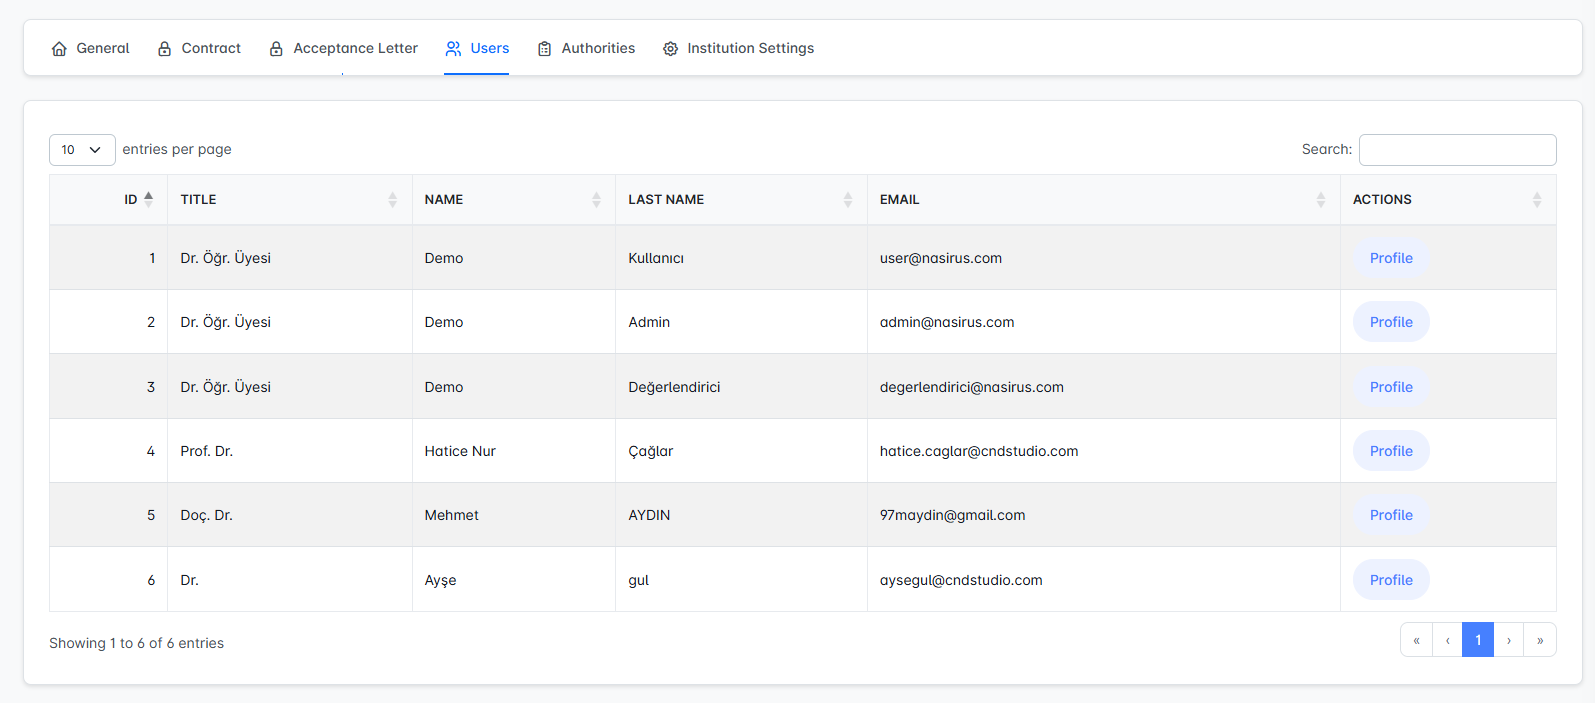
Each user’s title, first name, last name, and email address are displayed.
The Profile button allows access to the user’s personal information, submitted applications, publications, and contract details.
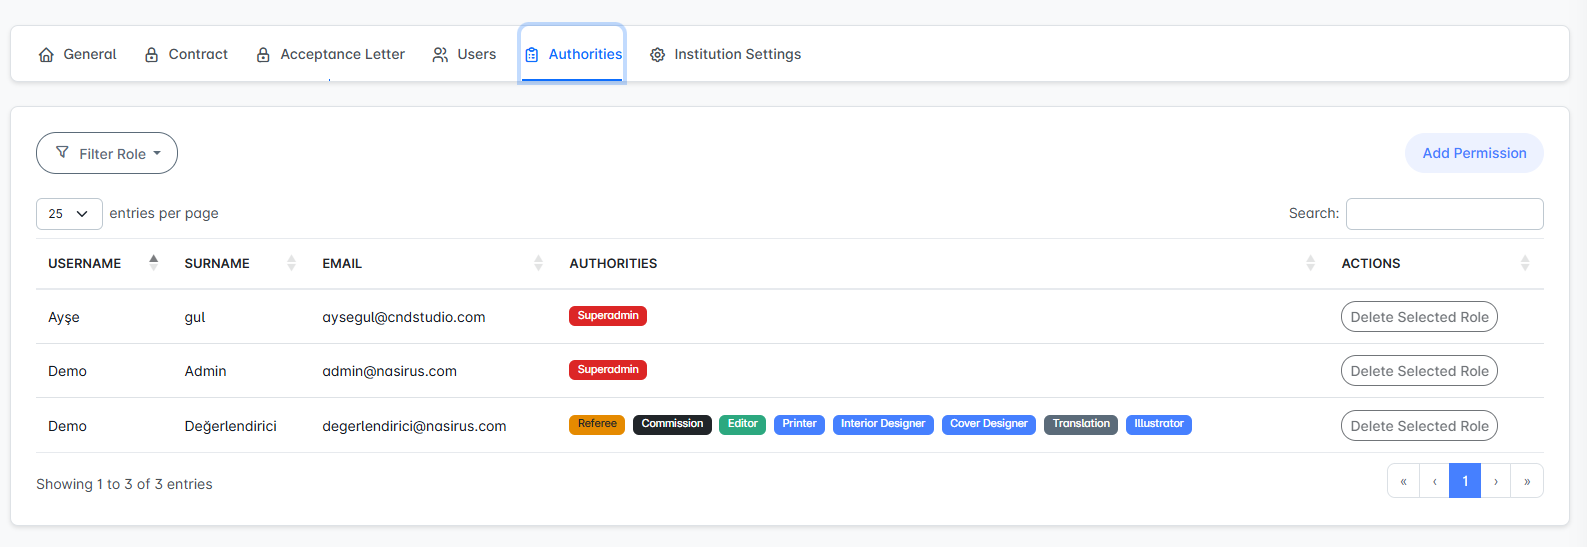
In this section, the management of user roles is performed.
Each user can be assigned one or more permissions. For example, a user can simultaneously be a Reviewer, Committee Member, and Editor.
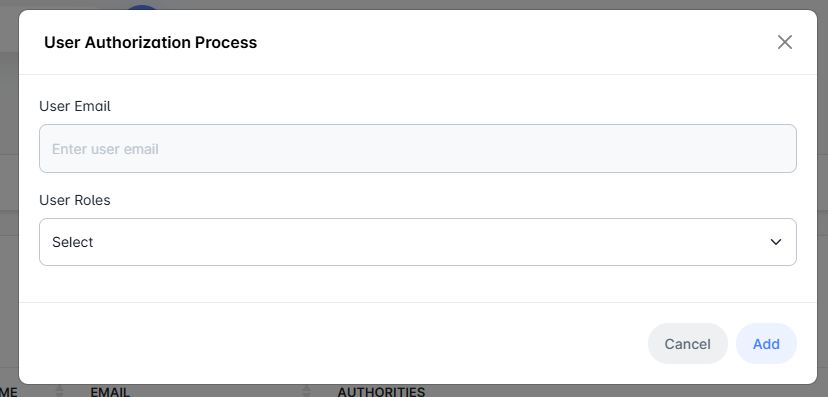
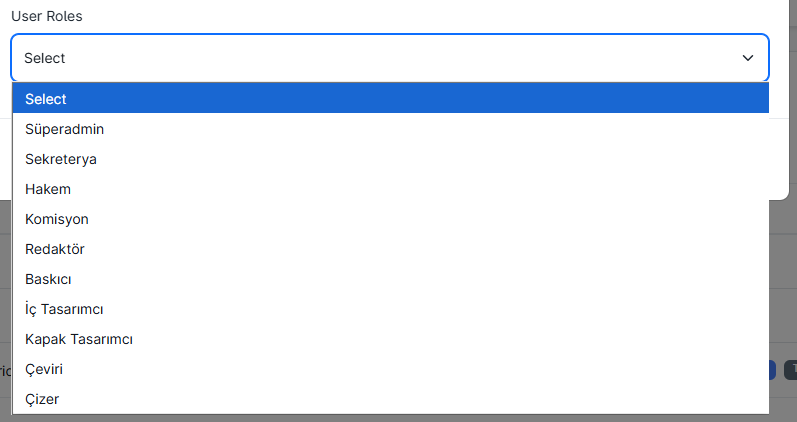
A new role assignment is made using the Add Role button. In the opened window, the user’s email address is entered and the appropriate role is selected.
Assigned roles are displayed as badges in the table. Roles can be removed using the Delete Selected Role option.
This structure is flexible; a single role can be assigned to each user independently, or multiple roles can be given at the same time.
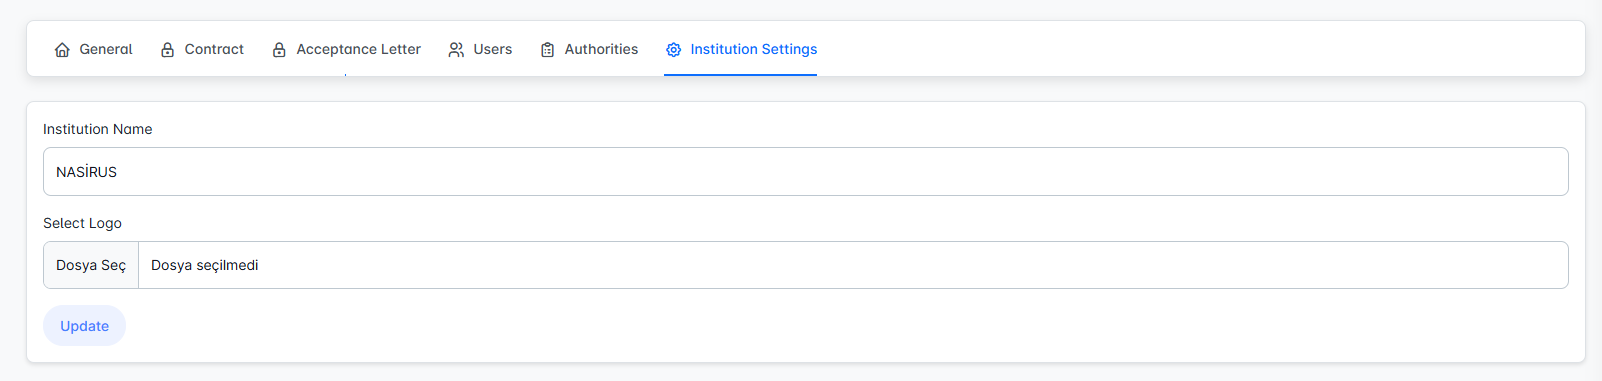
The Institution Settings tab is used to define the corporate identity of the system. In this section, the institution name is entered to determine the name that will be displayed across all screens. Additionally, a logo can be uploaded to reflect the institution’s visual identity in the system interface. To apply the changes, the Update button must be clicked.